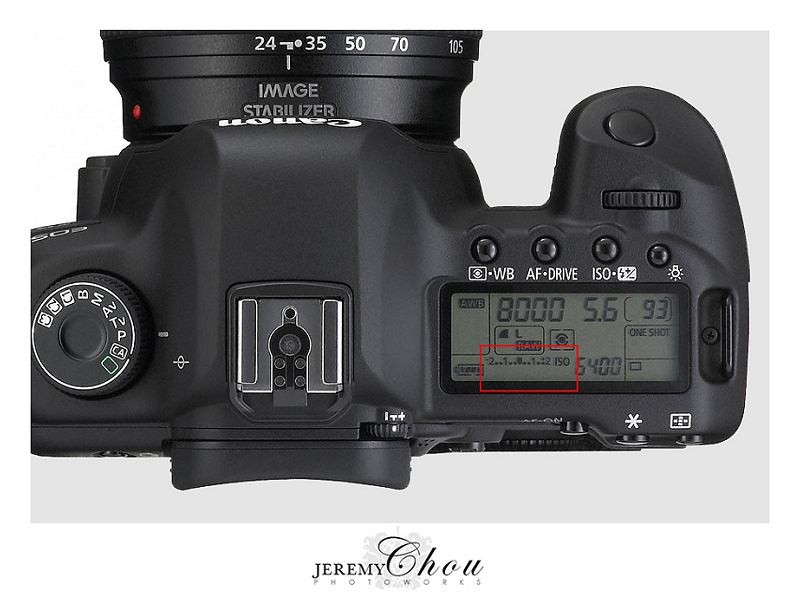
Quite a while back I received the question "What is exposure compensation and when do I use it?" Exposure compensation is an adjustment you can choose in camera to either add or subtract light in spite of what your in-camera meter is telling you is "correct exposure." Your camera's internal meter indicates the light your camera is reading from your surroundings/subject. Have a look at the tiny little "screen" up near your finger dial or look through your viewfinder and press your shutter half way down as if you're focusing on your subject. Your meter looks like this:

So now take your camera and focus on your subject of choice. If your exposure is "correct" then the little ticker/rectangle marker should be directly under the "0". If you are shooting in an automatic or partially automatic mode (A-automatic, TV - Time value/shutter speed priority, AV - Aperture value/aperture priority) then your camera is doing the work to 1) determine how much light is in your "scene" and 2) decide which combination of factors (*ISO, aperture, shutterspeed) to use to allow only the "correct" amount of light in to result in a "correct" exposure. So your camera will do whatever it needs to do to get the ticker under the "0". *Automatic mode will choose all 3 factors for you. In AV mode you choose your aperture and your camera automatically adjusts the remaining two factors. In TV mode you choose your shutter speed and your camera automatically adjusts the remaining two factors, hence these modes being partially automatic as your camera is still making 2/3's of the decision of what to do.
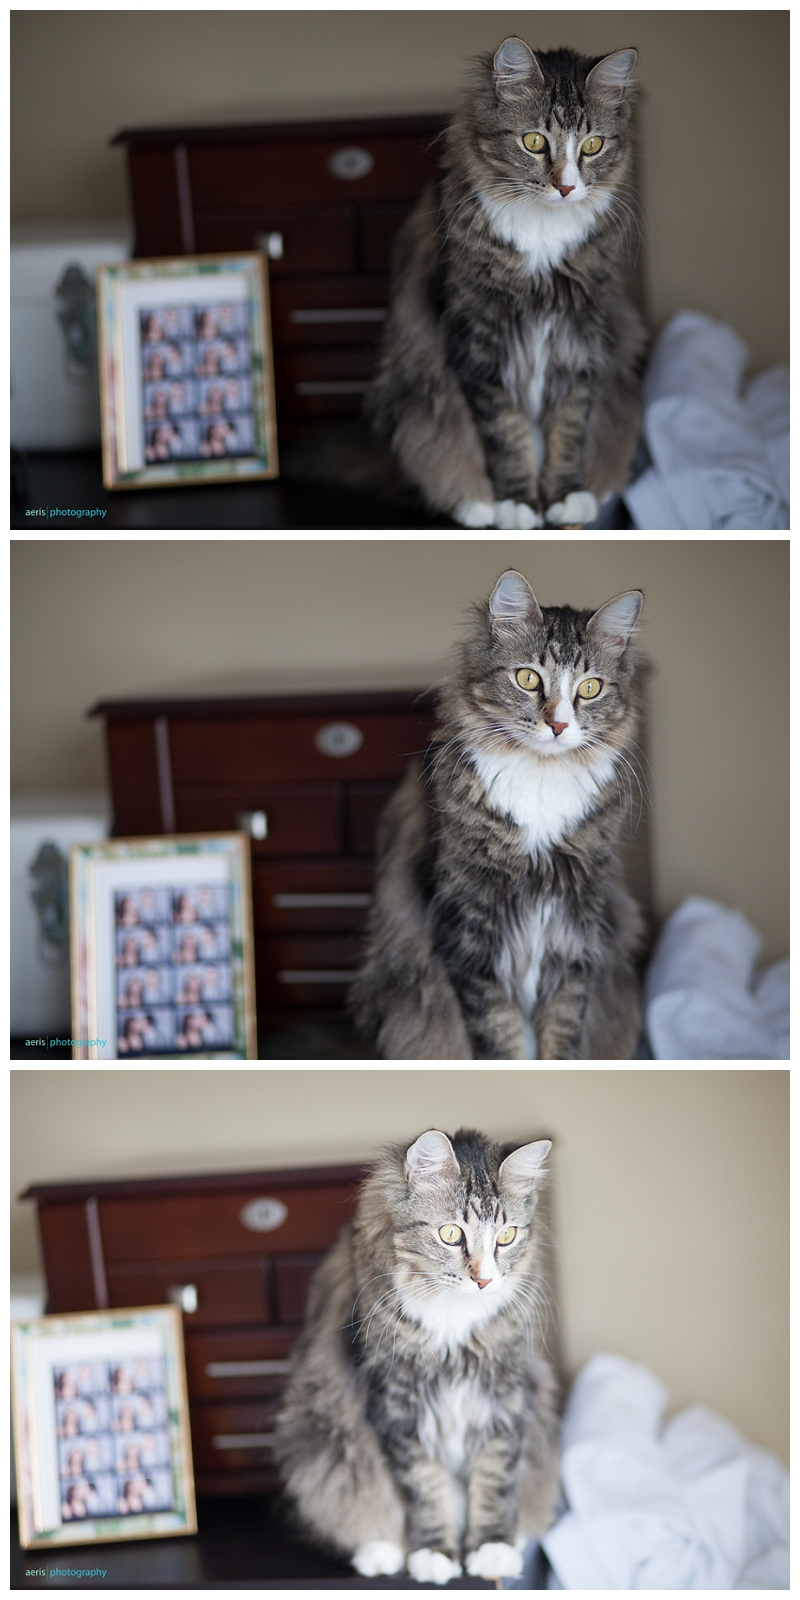
Here's an example using my little stinker, Denny, as a model:
Top photo: underexposed by one stop.
Middle photo: "Correct" exposure.
Bottom Photo: overexposed by one stop.
The "correct" exposure in this image is actually really great which happens in situations where light is closer to "ideal".

An example of when to use exposure compensation would be shooting outside on a freezing cold, white-with-snow, Edmonton day like today! Let's say you have your friend standing in front of you outside and there's snow on the ground, snow on the trees, snow everywhere.... If you have your camera set to an automatic/partially automatic mode then your camera looks at the situation (all the snow) and decides "It's so bright!!!" and therefore decides that it needs to let less light in in order to obtain the "correct" exposure (ticker right under the "0"). So, with your camera making the decision then guess what will happen! Your "scene" will be darkened to the "correct" exposure and your friend standing in front of you will be underexposed. Now if you use exposure compensation to tell your camera to overexpose the situation by a Stop or so (a Stop is a measure of light...one stop would be moving your ticker from the "0" to the "1") then even though your camera is still choosing the settings you've told it to expose one stop brighter by default. A little confusing, I know, but hopefully the concept makes sense. Setting exposure compensation varies among camera models so have a look in your camera's manual (or google it) to see how to set your specific camera.
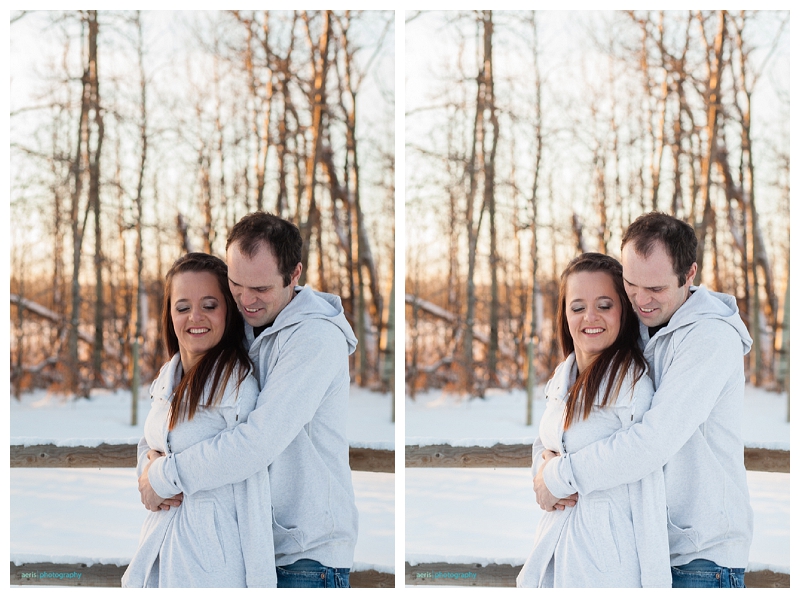
Have a look at an example where I chose to over-expose in a snowy environment:

Ok, now I need to clarify: I NEVER use exposure compensation. I 100% believe that it's not worth having an amazing DSLR camera unless you shoot in Manual mode. Manual mode allows you to choose and control every single thing about your camera in order to achieve the affects you want. Again, it's my personal opinion, but I'm the photographer so I should be calling the shots. I don't like my camera choosing what it wants so I've invested a lot of time in learning how I get to tell my camera what to do. The same concept of exposure compensation can be utilized when shooting in manual it's just that I'm the one deciding when and where to manually bump up (or down) my exposure to get the look I want. The couple's snowy photo above? The "correct" exposure on the left had their faces too dark due to all the "brightness" detected in the surroundings so I simply over-exposed manually for the situation :)
Have a question you'd like answered in a blog post? I'd be happy to do my best to answer your photography queries!


